Cheapskate Photographer
No doubt about it, I am cheap. I will always look to find a bargain or a cheaper option, even if that means contrapting some weird workaround that takes twice as long to do. I get this attitude from the way I was brought up. Single-parent household, mum worked all the hours she could to feed and clothe us. Dad was sort of involved but never wanted to give a penny to Mum, despite being more than wealthy enough to. I learnt quickly how to get stuff cheap or even free by asking nicely and, on occasion, stealing. Nothing too massive, the sweet shop was easy pickings, but I soon moved on to stealing lighters or cigarettes ect.
This cheapskate attitude has stuck with me my entire life, and it’s one of the things about myself I don’t fully despise and actually sometimes find quite interesting. Have you ever watched those crazy TLC shows “Extreme Cheapskates” where people make coffee through a sock or don’t buy deodorant, instead collect free samples and make a mega deodorant? Well, I’m not that bad, nowhere close in fact. I do spend money on normal things and even drop large amounts of cash on stupid items like Harley-Davidsons from time to time.
When I started photography, I saw all the big expensive things and honestly felt like I was going to faint. 1DX II’s were one of the latest and greatest cameras ever made. £12,000 however was around £11,800 outof my budget. Finance certainly was not an option back then either. So I started doing my research, after all, research is only time and as a 16-year-old, my time was pretty much free. What else was I going to do? 4 am doesn’t quite hit the same if you don’t have a laptop open, researching every little thing about cameras or the physics behind lens designs and the science behind exposure.
So I spent hours and hours, probably even days, looking into the specs of cameras. Then it was time for cross-examination. What of these specs did I need exactly? Then the million-dollar question: what was the cheapest camera I could get my hands on with the specs I needed? Immediately, I wrote off full frame. At the time, nothing full frame was remotely quick enough FPS-wise for me. Mirrorless was not even an option for anyone remotely serious. Nikons were dumb and looked geeky, and all the people I knew and loved photography-wise shot Canon, so the choice was made.
I settled on a Canon 7D on eBay for around £250. It was far from perfect. The camera had definitely seen a life, but the money I saved by not buying a new one or an 80D at the time was enough for me to go on a trip and actually use the thing. I realised immediately how good it was to get a deal in photography and took this attitude forward, continuing to the current day with the things I buy, the processes I use, even the software I have.

So let’s do some tips for how you can save a bit of moolah when it comes to pursuing the most frivolous hobby or worst paying job, depending on your outlook on life.
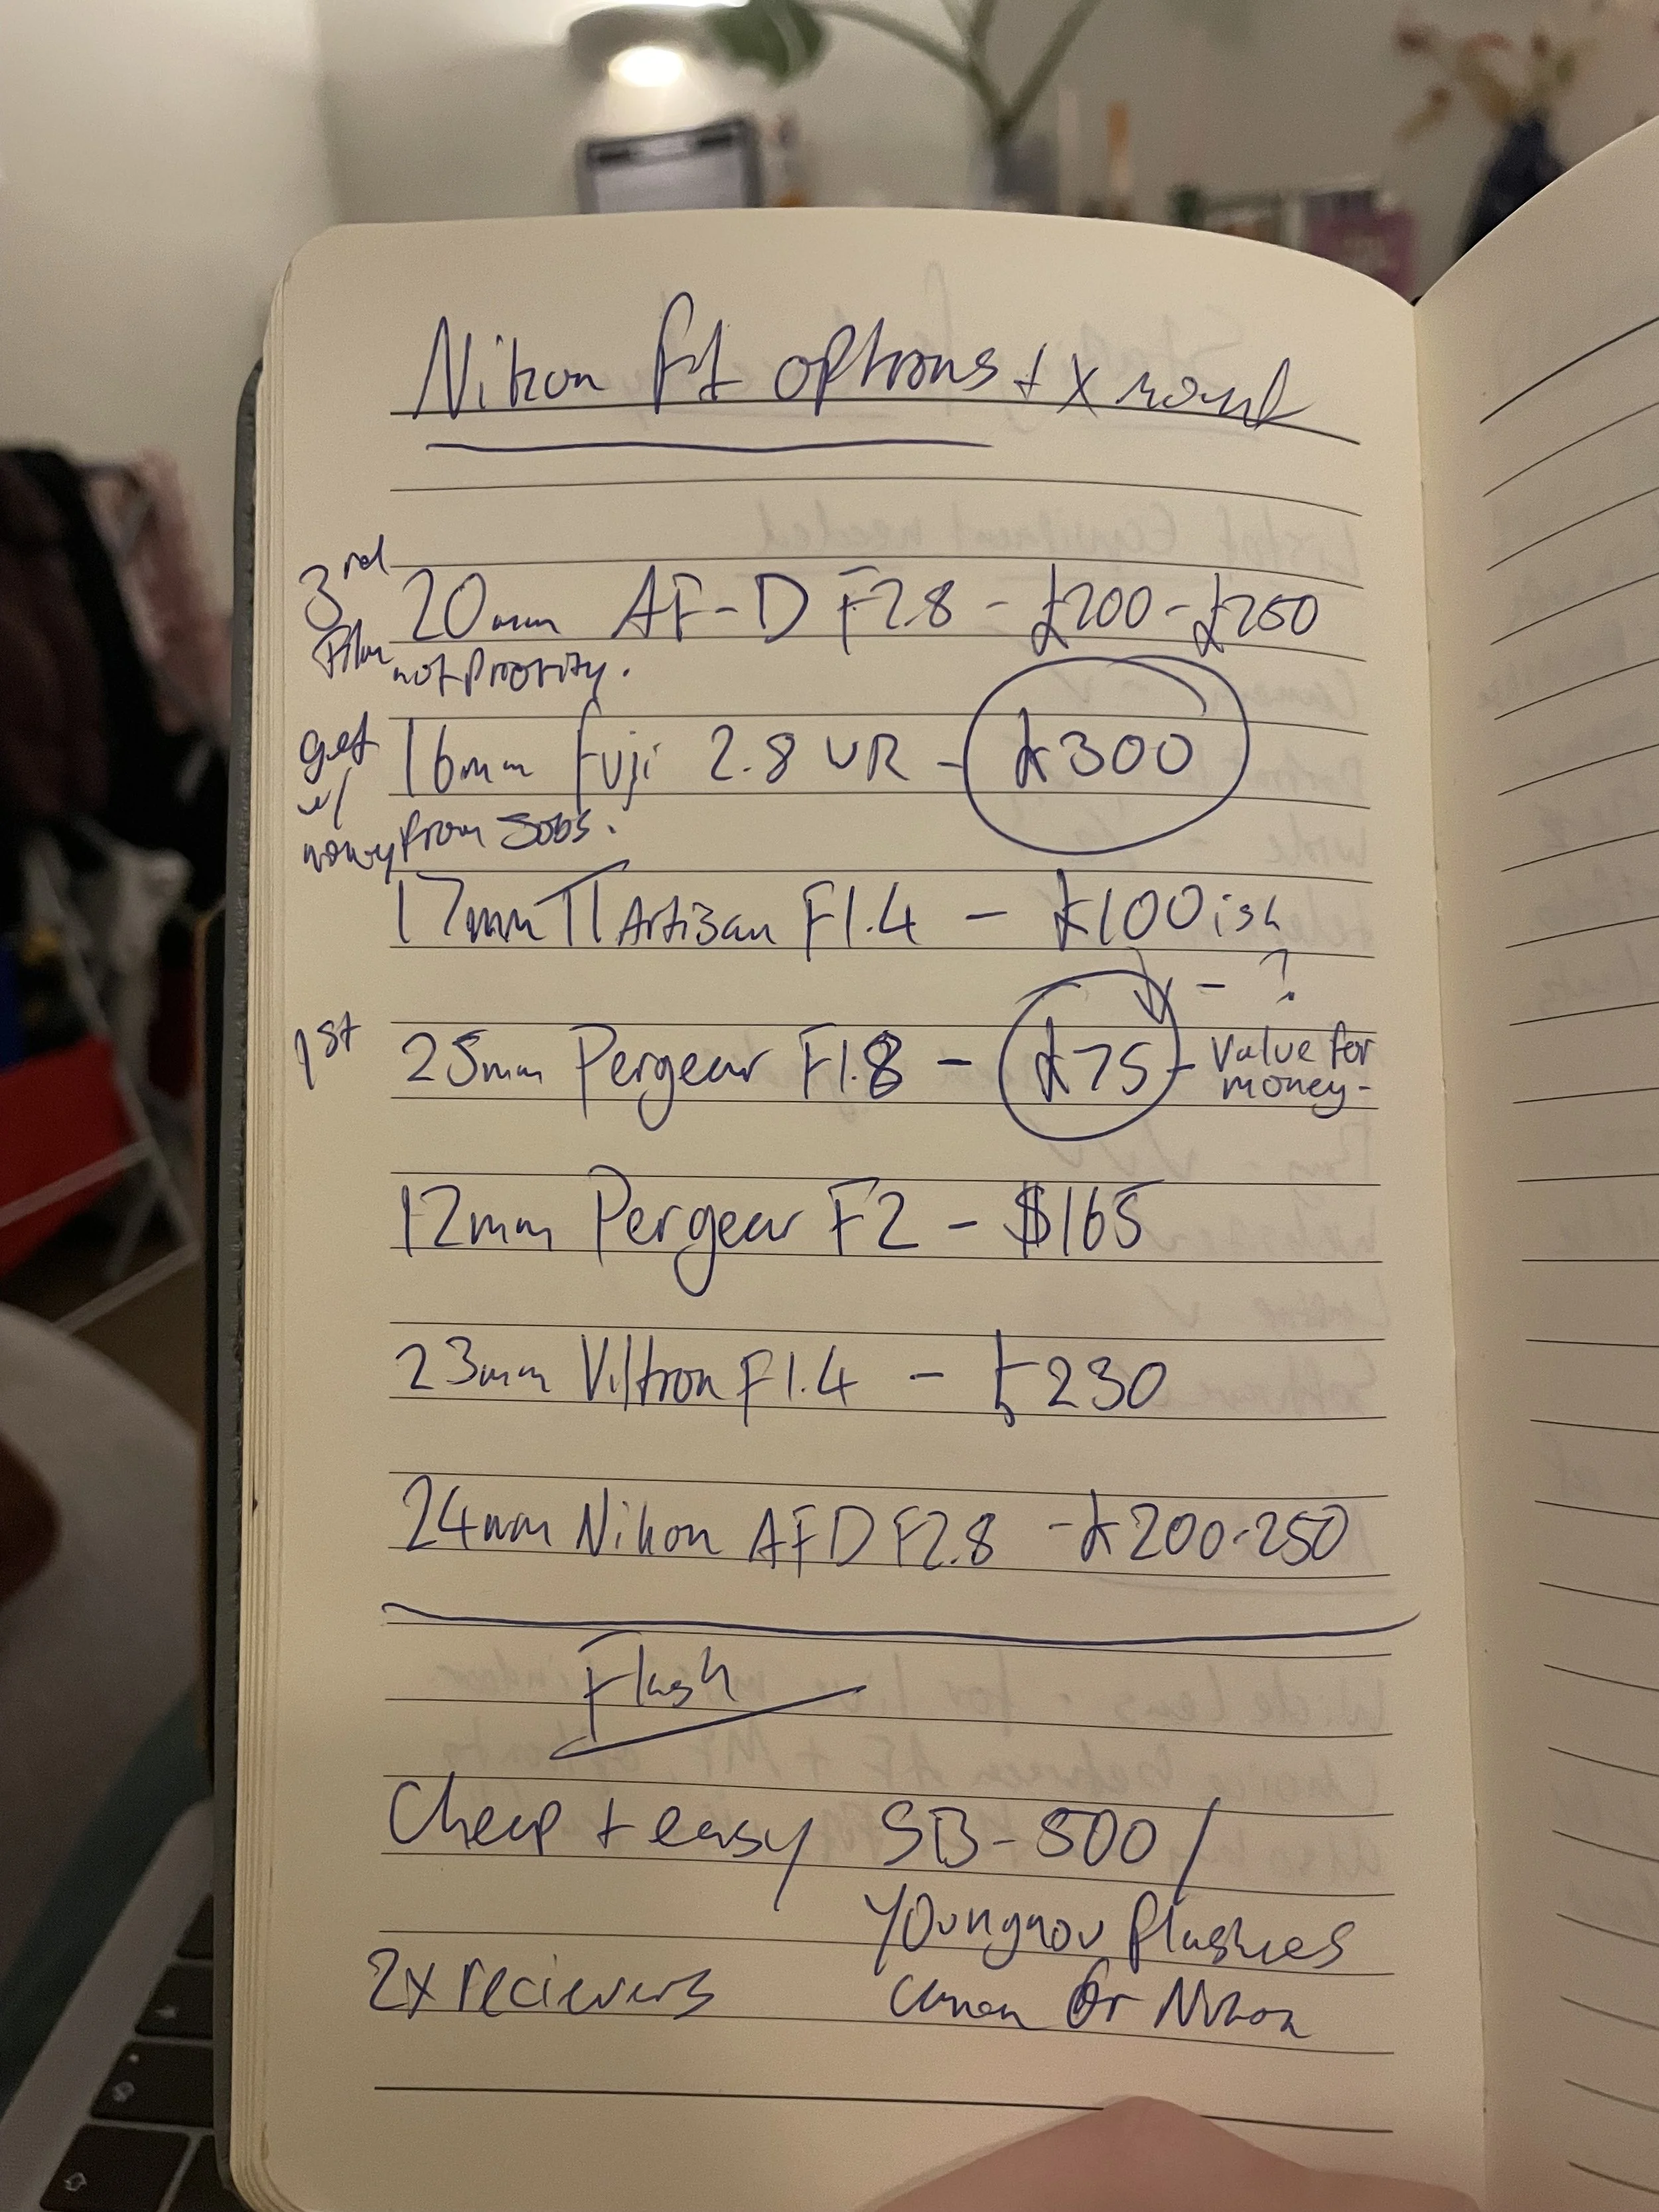
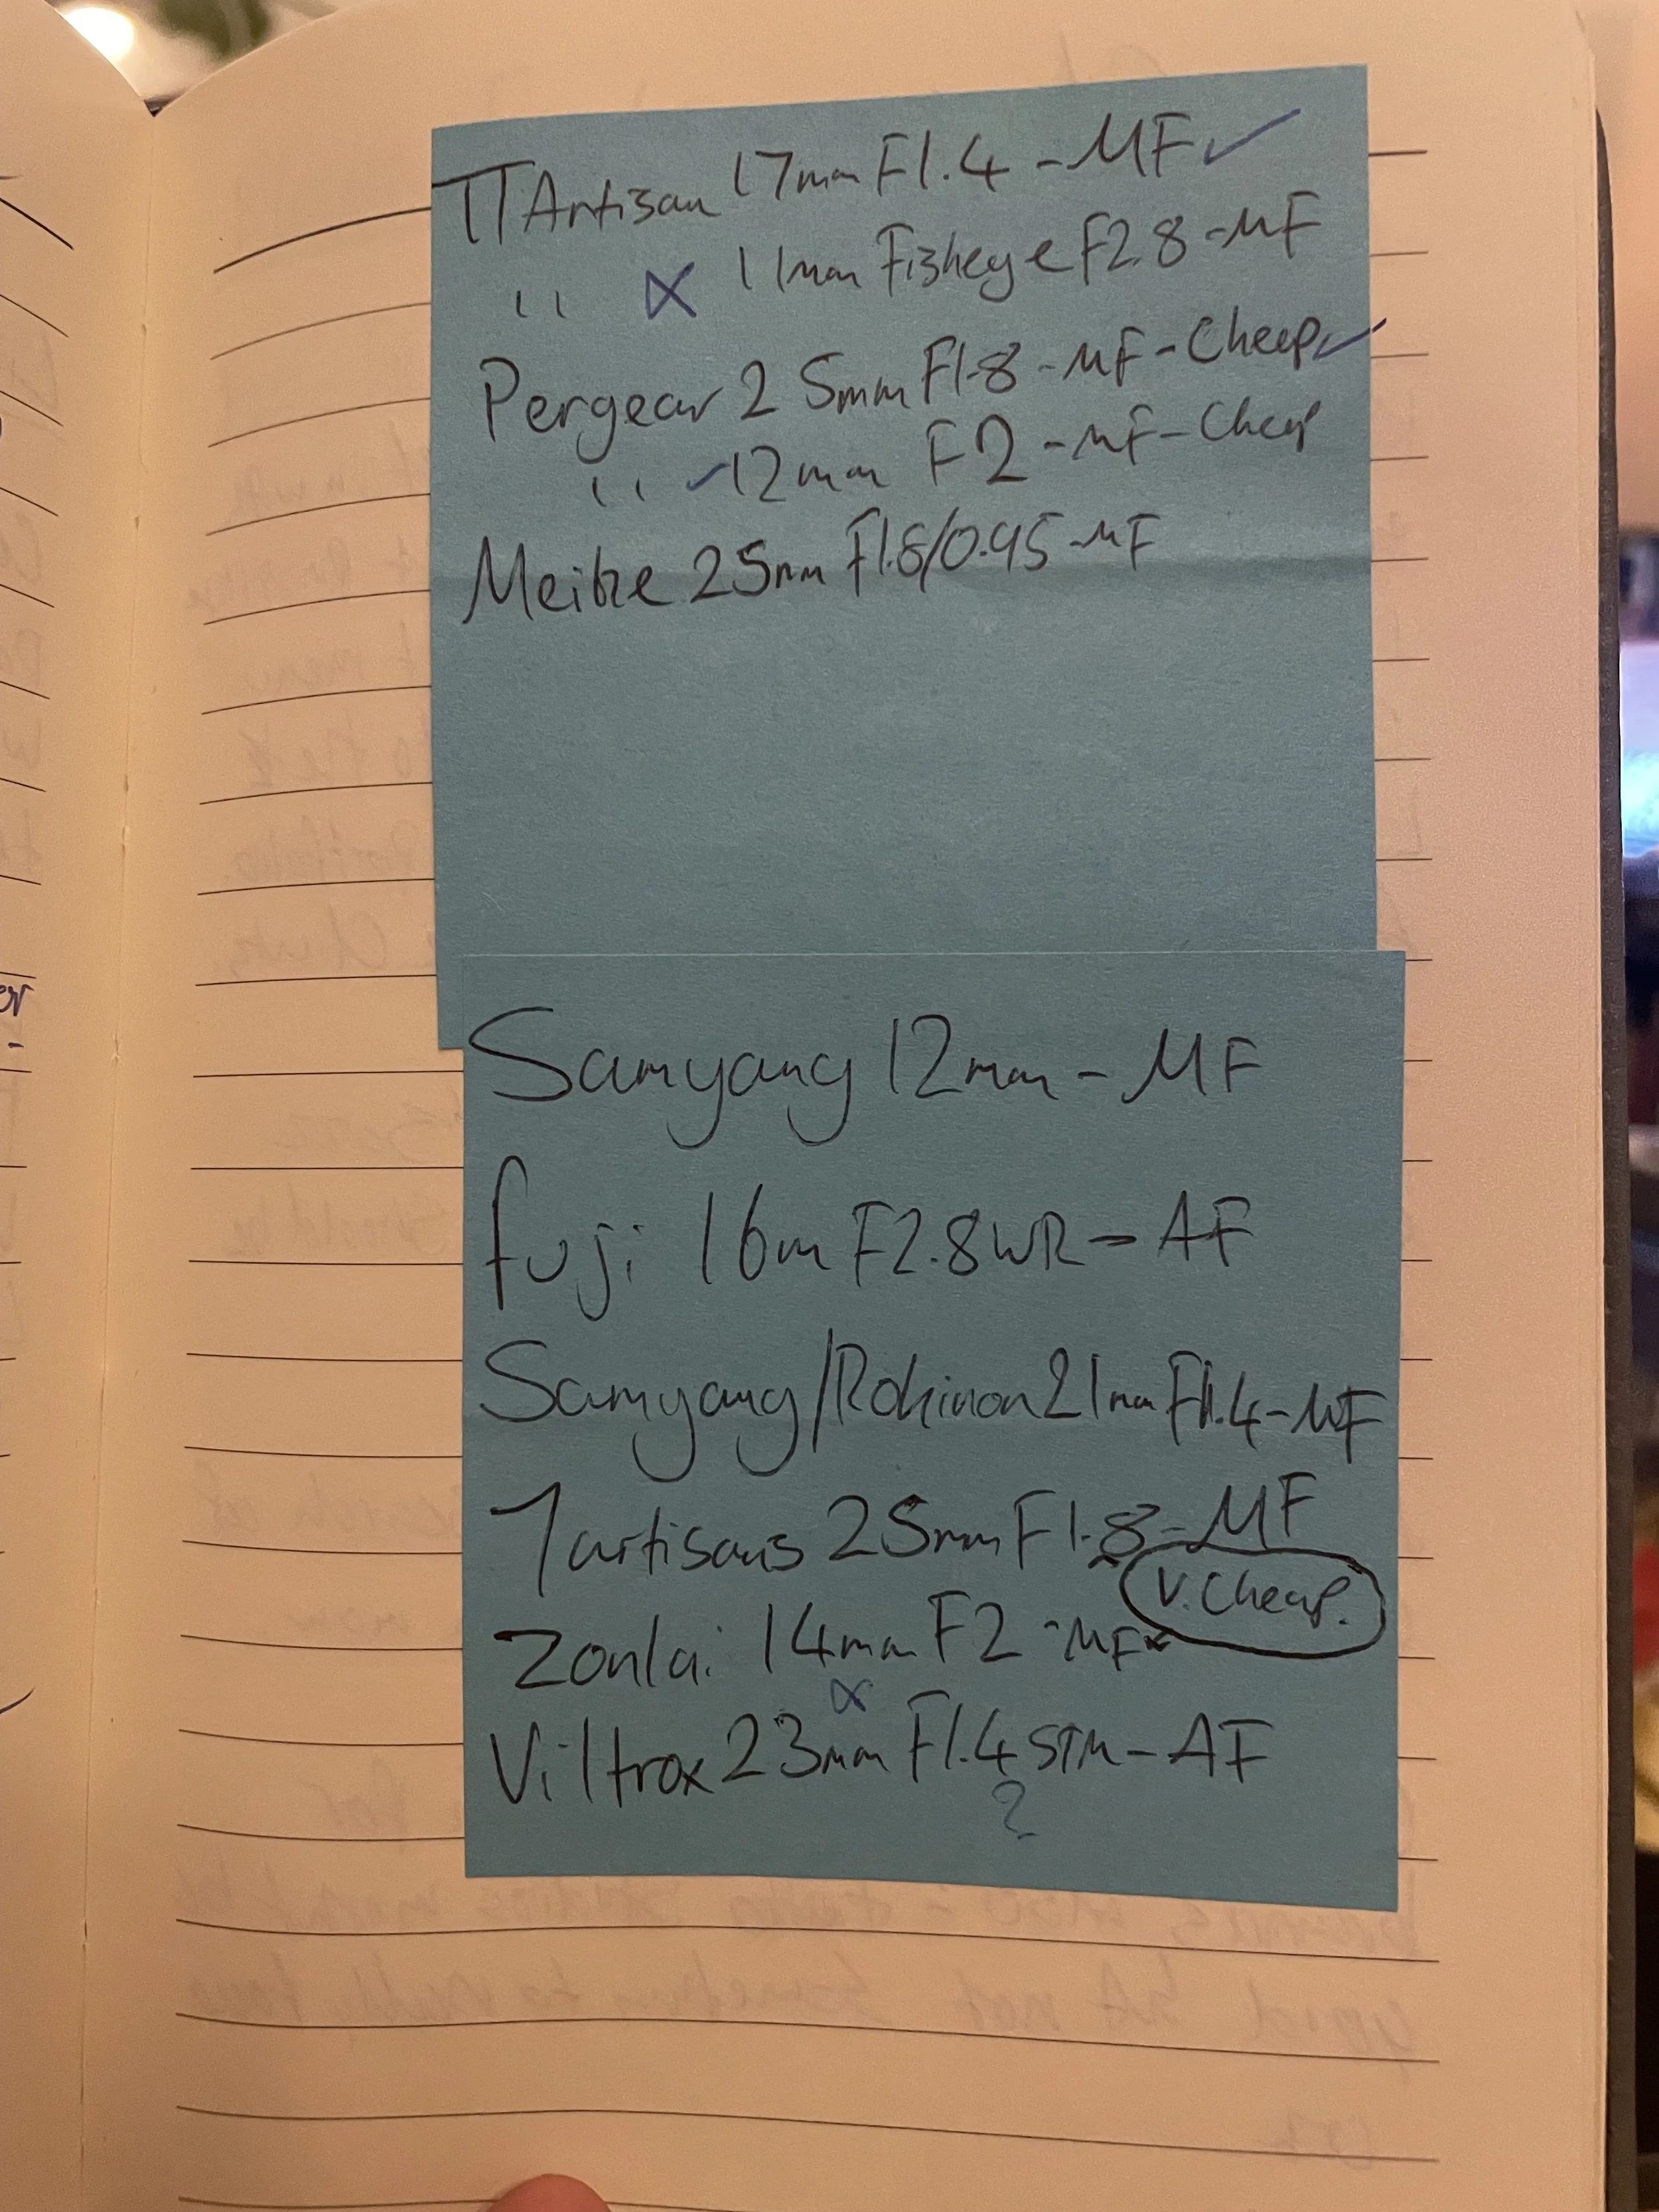
Tip 1: Nothing wrong with used. I have never bought a new camera, and wherever possible, I look to buy second-hand. Lenses, flashes, bags, hell, even softboxes. I am currently using all of these things in my “professional” kit, and none of them came brand new. The light modifier came from Vinted, a great place to look for cheap photography stuff or second-hand pants if you want, I guess? The photography industry as a whole is very wasteful. Professionals will buy new gear to keep up with spec demands pretty much every 6 months now. This means they are selling their old kit every 6 months, pumping the second-hand market full of decent kit that sometimes has had little to no use. This is especially good for Sony shooters, as that brand has the ability to make a “new” unit every 7 months on average and pretty much force pros to buy the new one despite the old one having nothing wrong with it and still being perfectly professional enough to use. The money saved can often be around 40-60% of the new price, and those extra funds can be put towards some more used kit, and before you know it, you have a full setup for the price of one new camera.
Tip 2: There are always workarounds. This applies more to processes within photography rather than actual kit costs. For example, software. In my opinion, the monthly subscription model is one of the biggest scams in recent years. You used to be able to just buy software outright and then use it as it is. No patches or weird software updates every 30 seconds, just a box full of 1’s and 0’s that did its job somewhat well. Adobe are the biggest problem, and sadly, I have yet to find a decent alternative to them that will do the jobs I want. I have, however, managed to lay out books in Photoshop rather than spending the extra money on InDesign. Very simple, and a few Google searches working out guides and layout shortcuts saved me around £25 a month. Tethering and scanning are also a pretty big process that can really spike up your costs. Some film shooters swear by scanners and software, and it usually tends to be a high cost outlay with only one real use. I found a bit of a cheaper way around this all. For black and white film, I created a manual inversion preset in Lightroom. I already had the software, and building the preset took me maybe 10 minutes. Then I used the tethering capture feature and connected my Nikon D600 to the software, and combined with a Macro lens and small £15 light box and a holder, I have a DSLR scanning setup which rivals most scanners in terms of speed and resolution. Yes, you do need a macro lens; however, this purchase will feature in a later tip. The scanner would have been £450ish, or the option was Negative Lab Pro, which is a £100 fee. My small cost of a USB cable and a holder/light box gadget got my price down to £30 max.
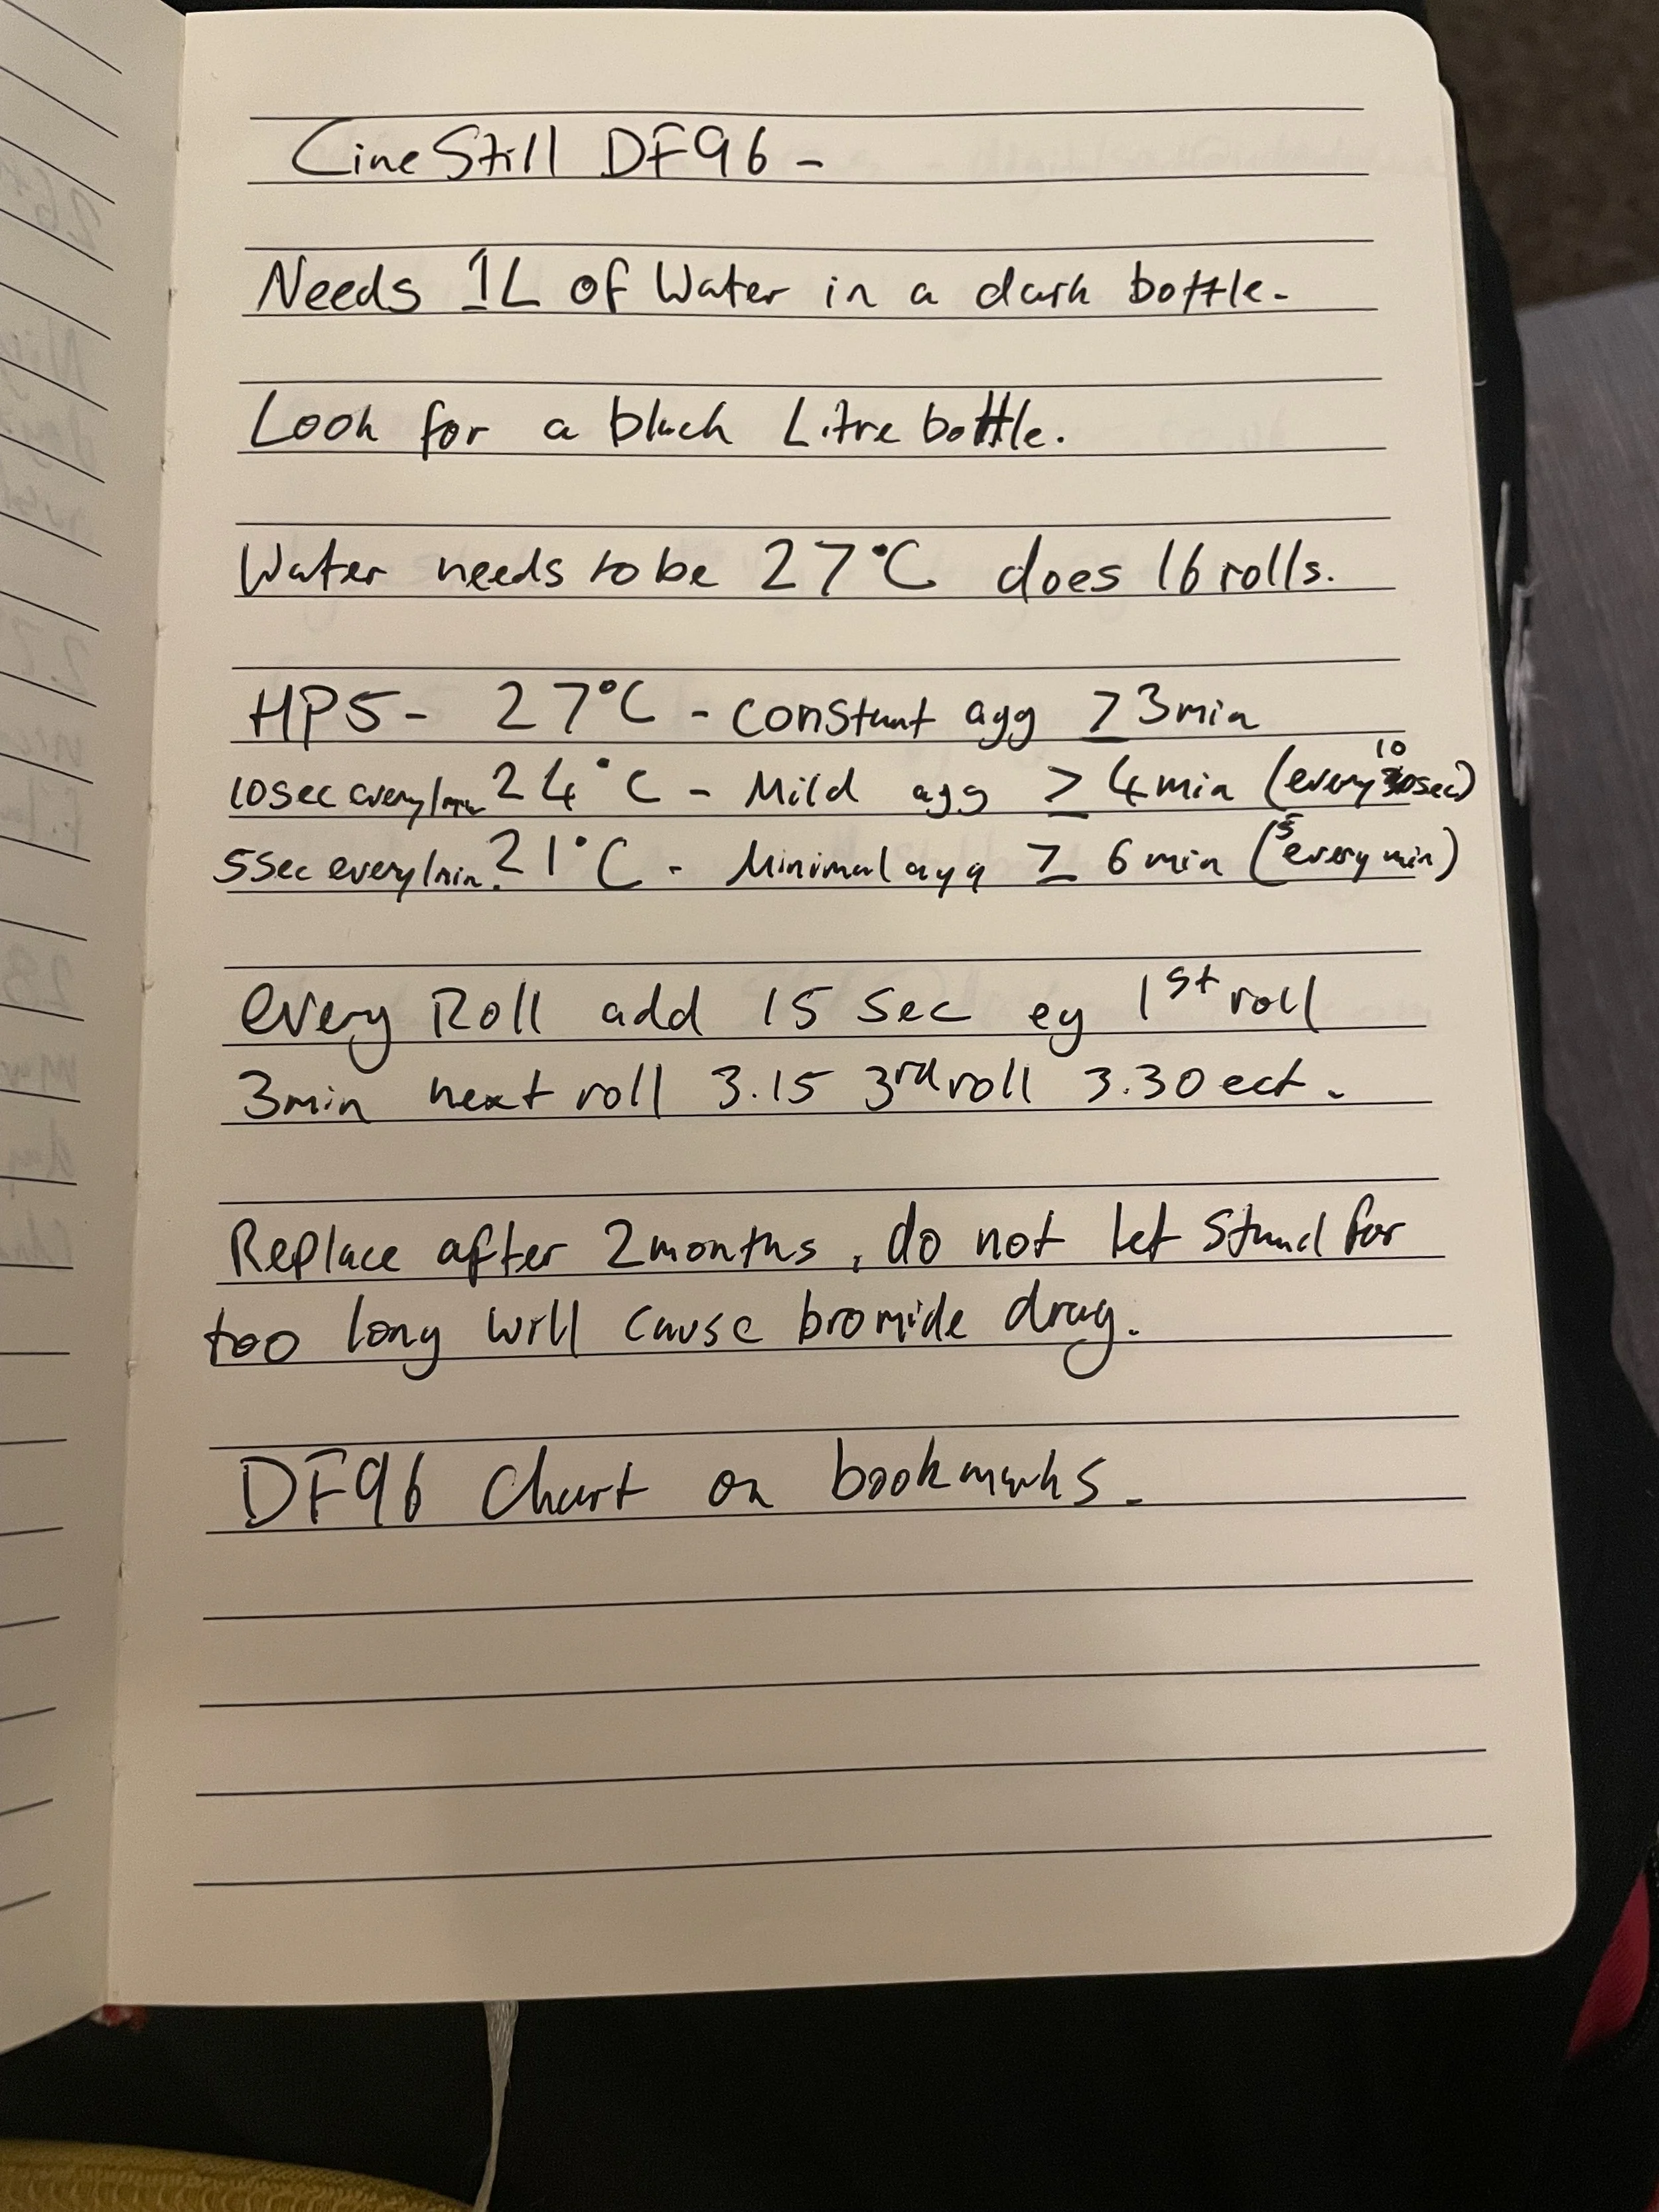
Tip 3: If you learn a process you normally pay for, you no longer have to pay for it. For example, film processing. I shoot in black and white pretty much exclusively. Was this a stylistic choice? Perhaps a deep soul searching journey discovered I only see the world in monotone? Honestly no. I love black and white, and I think my work definitely leans into it; however, it started because it was the easiest type of film to process myself, which I could do at home and save the cost of taking rolls to the lab. As always, I started my research, asking at local labs how the film goes through their machines. Then started watching videos on how film gets developed. I did a short 1-day course when at college, but a lot of weed and alcohol have gone through my brain since then, so I struggled to remember exactly how the process worked. Then I started looking at setup costs for the developing process and how long until I would start to see my money drop from going to a lab. I worked it out to be around 10 rolls, and I would be making money on the process. I researched whether to use one-shot chemicals like Rodinal and then use separate developers, stop baths and fixers. I decided to use CineStill DF96. This chemical is a reuse process controlled by heat rather than time and allows me to develop around 16-20 rolls per spend on the litre. At £25ish a time, I have worked out I am developing and scanning rolls for around £1.50 a roll compared to the £10 a roll at my local film lab. A fun side note on this is that learning the process has not only saved me money but also increased my knowledge on how film works and how certain heat or agitation methods can dramatically change the way a film looks and shoots. Also means I can push/pull and adapt my developing technique accordingly.
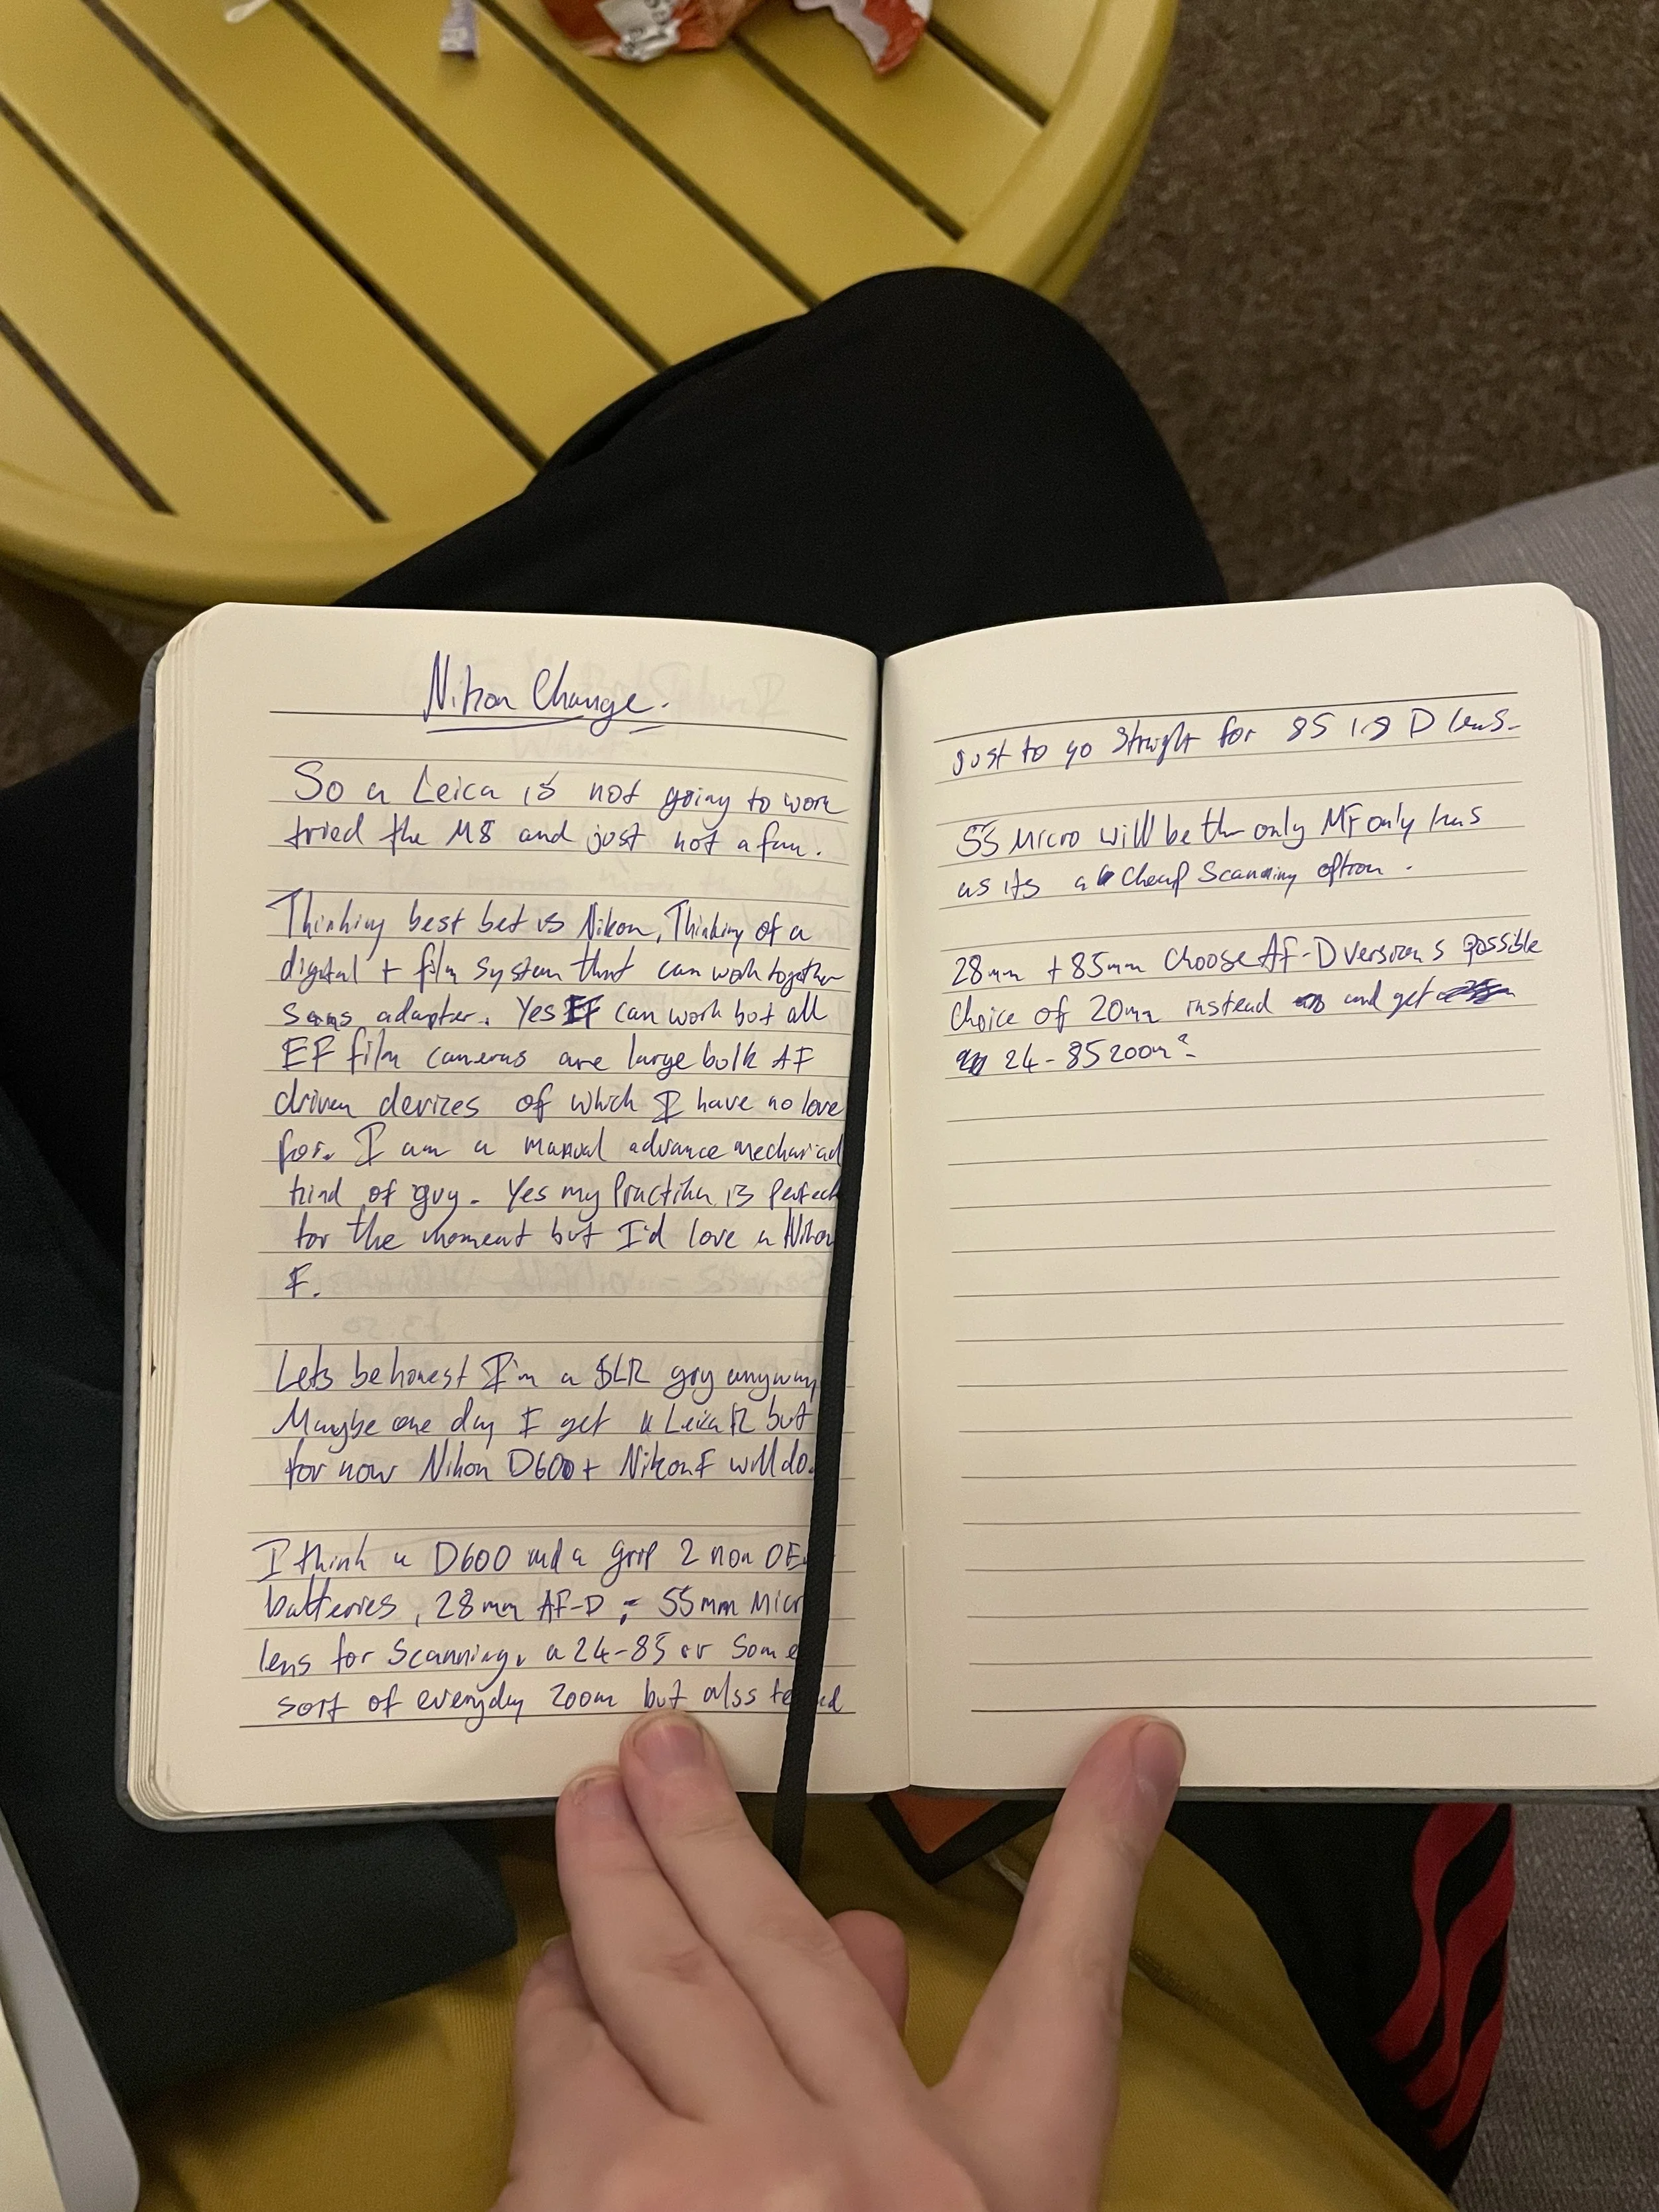
Tip 4: Multi-purpose spending. This is a really big thing to consider. When you buy a large purchase, can you use it for more than one thing, or is it a one-trick pony, so to speak? For example, my scanning lens, as mentioned above, is a 105mm Sigma Macro lens. It is a very good lens, and I bought it due to the fact that I can use it as a scanning lens, portrait/product lens and also a short to mid-range telephoto lens for any sport I find myself shooting from time to time. The lens is versatile despite being designed mainly for macro usage. I highly advise that before dropping a few reddies, make sure you have a look at the item and consider whether I'm only buying this for one use or if I can use it across a few different situations. This to me also applies to film cameras. I stuck with Nikon because I can use my lenses from the D600 across the film bodies also. They are not the best film cameras by a long way, however, they are solid and work with all but one of my lenses and allow me to use my flash triggers as well. Suddenly, the £50 cost per film body is looking pretty good, even if I can’t use the 105mm Sigma lens, annoyingly.
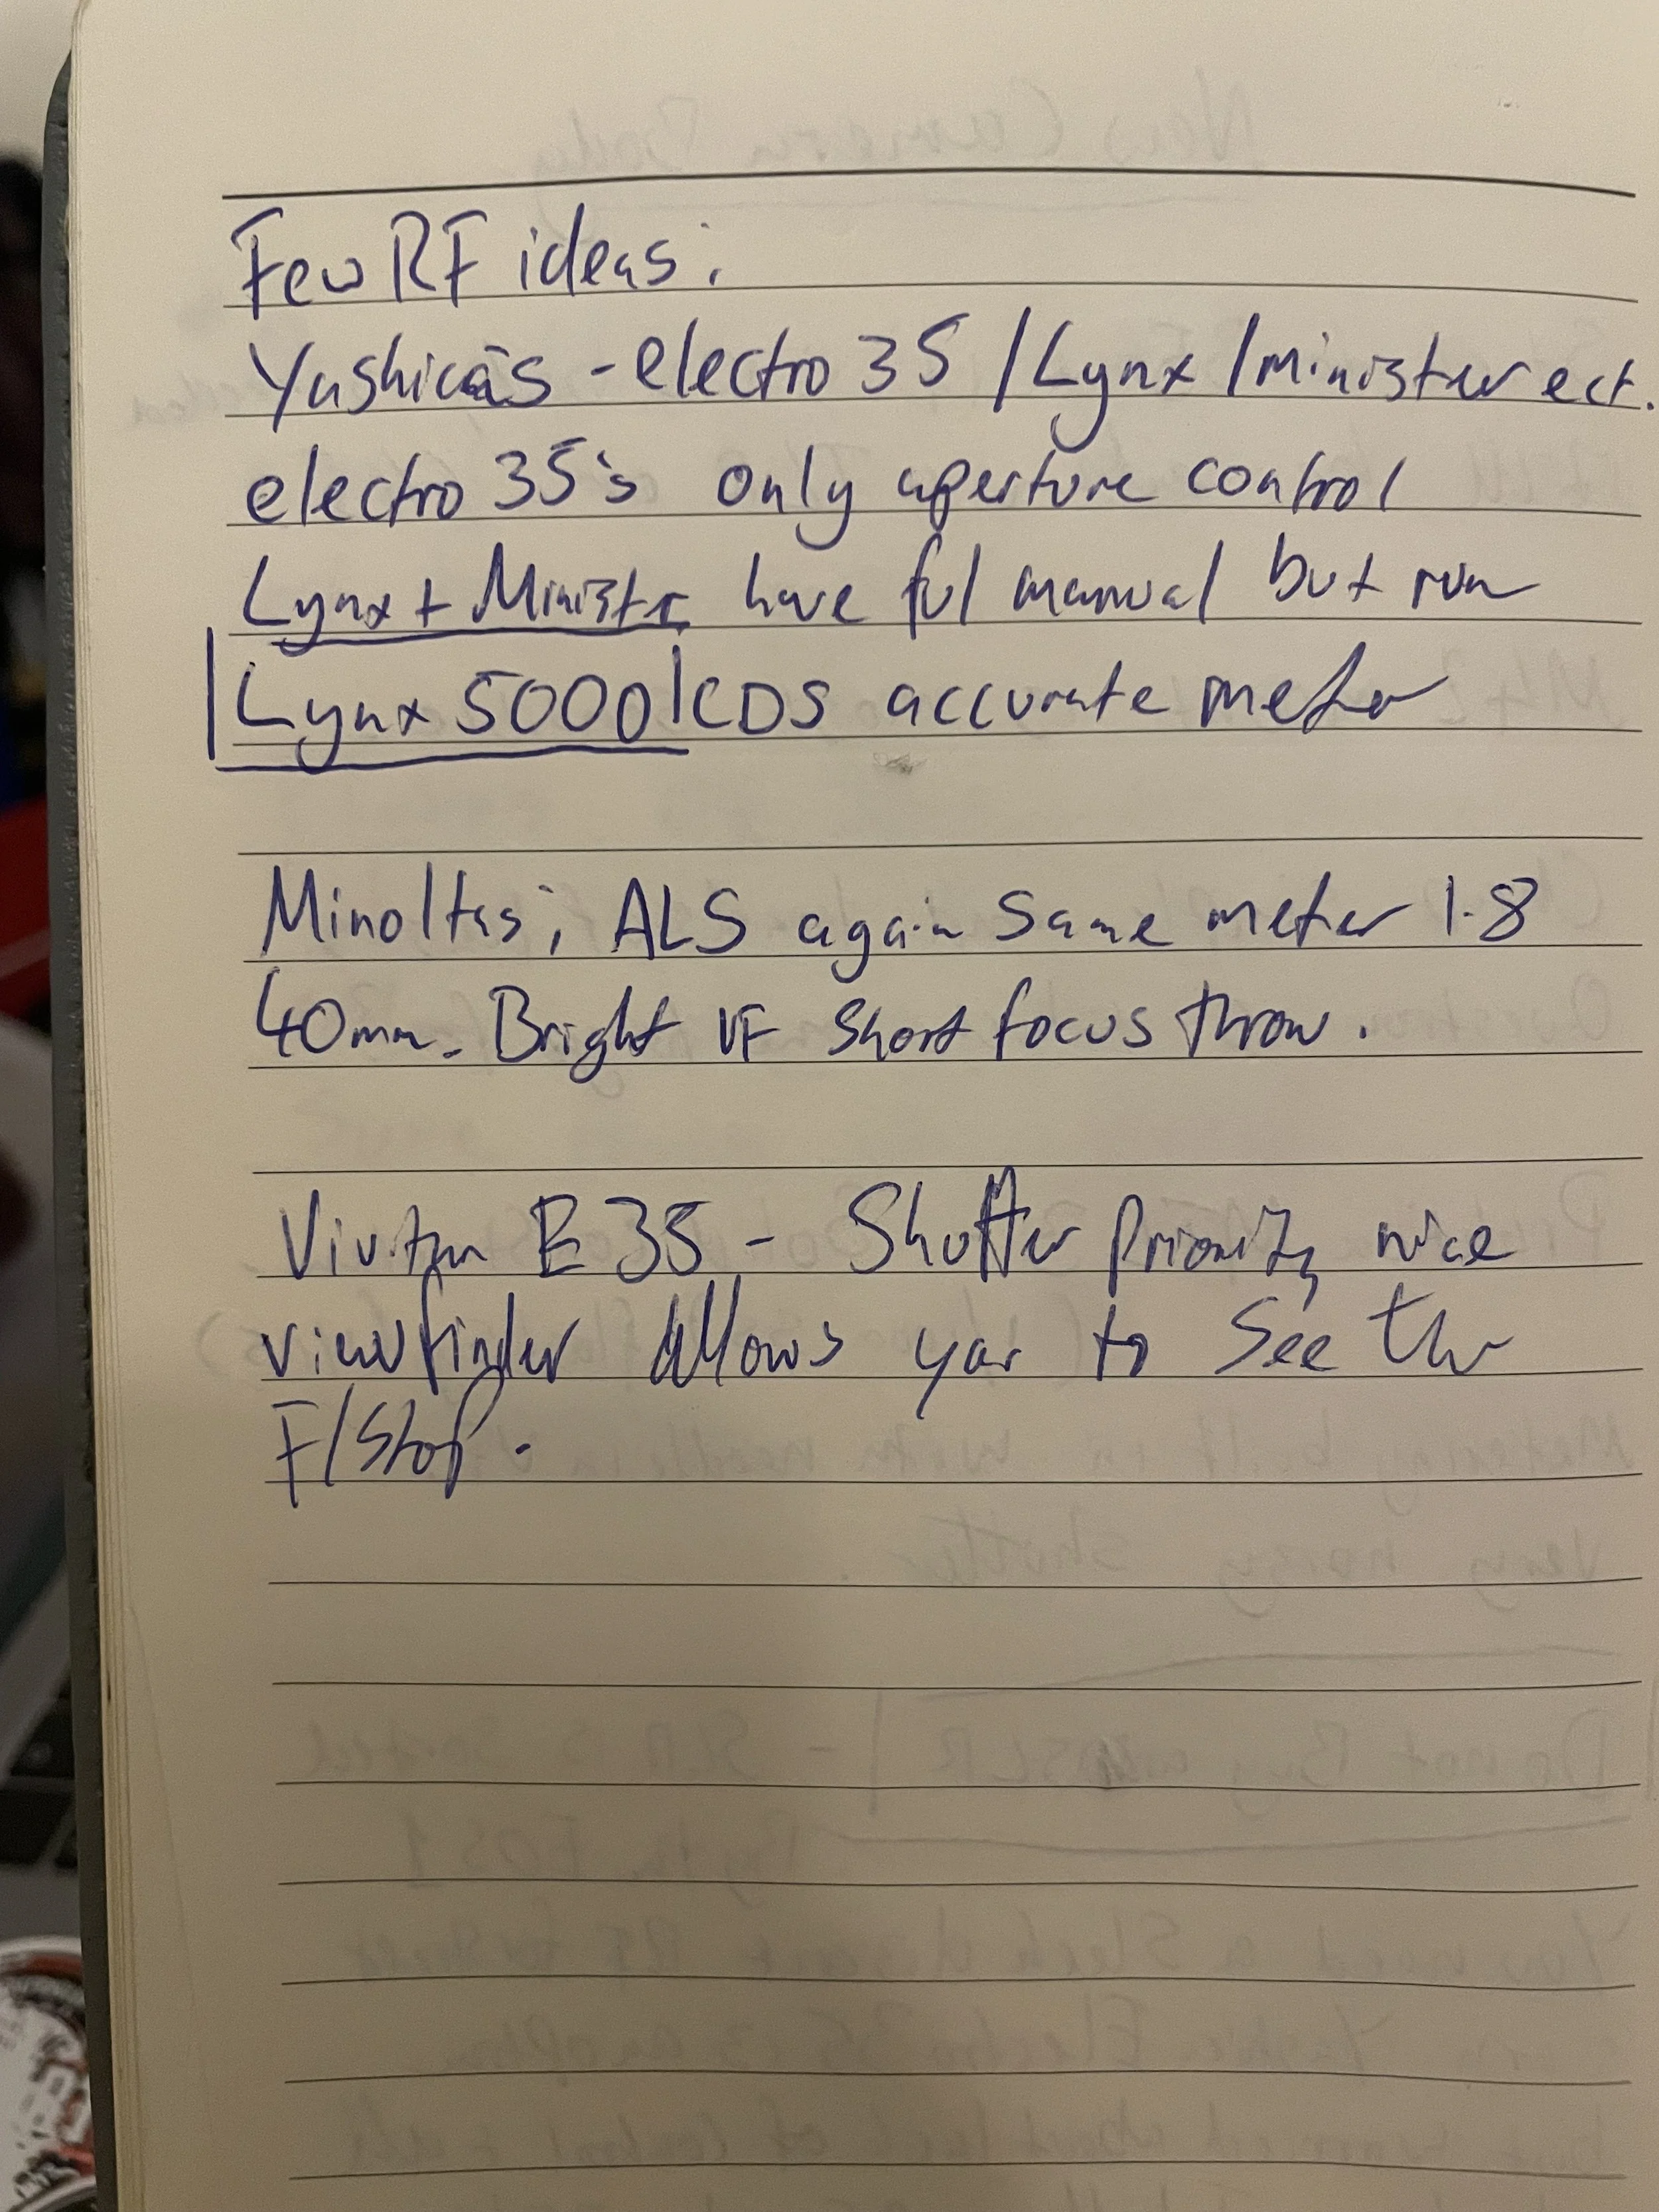
Tip 5: Mentors and friends. A critique of your work can quite often be the best money-saving method you will ever get. It can completely derail the equipment you use and can cause you to realise the flash or lens you have paid a shedload for is actually doing your work a disservice. Sitting down and really looking at your work with someone else can even inspire you to take a trip and put the money you would have spent elsewhere towards a project you didn’t see that much value in until then. Let’s also not forget the occasional freebie/throwaway you might get from someone or a deal on a piece of kit you are after that they have for sale that isn’t working for them. The number of things I have been given by older photographers who just wanted to get rid of things from their studio is insane, and most of them I still use to this day. Connections and networking may not seem like a cost-saving part of photography, more of a money-making part of it, but you never know. Having your face and name out there can sometimes give you that bit of advice or kit loan you need to make sure the money you spend isn’t wasted.
I hope these little tips help you save some cash the same way I did as the less money you spend on tech or glass you get to spend on projects or travelling which is the most important thing in photography as you can’t make decent work with nothing to photograph.